Schluter®-KERDI-BOARD
$29.52 – $120.16Price range: $29.52 through $120.16
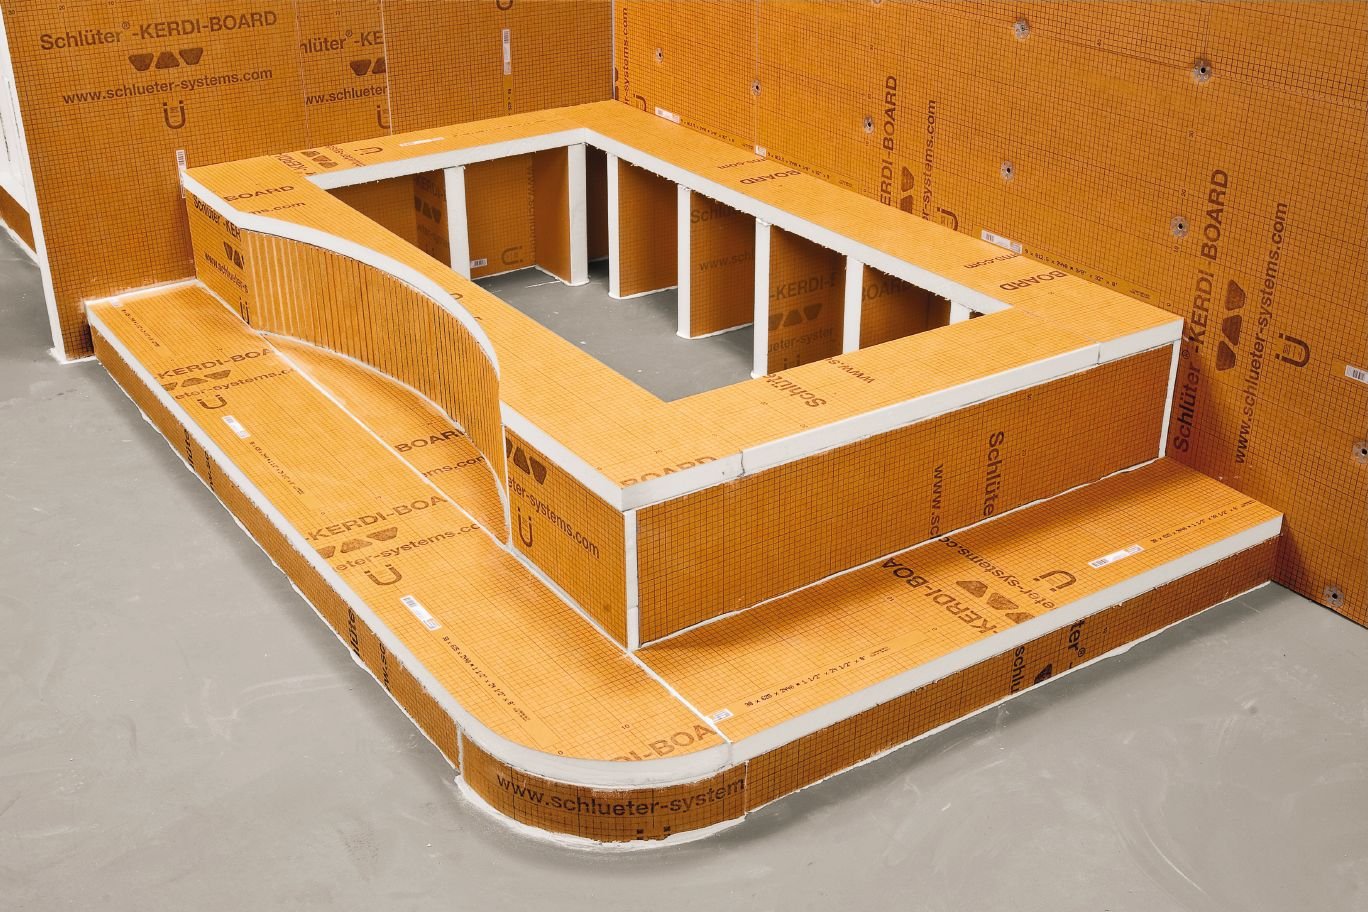
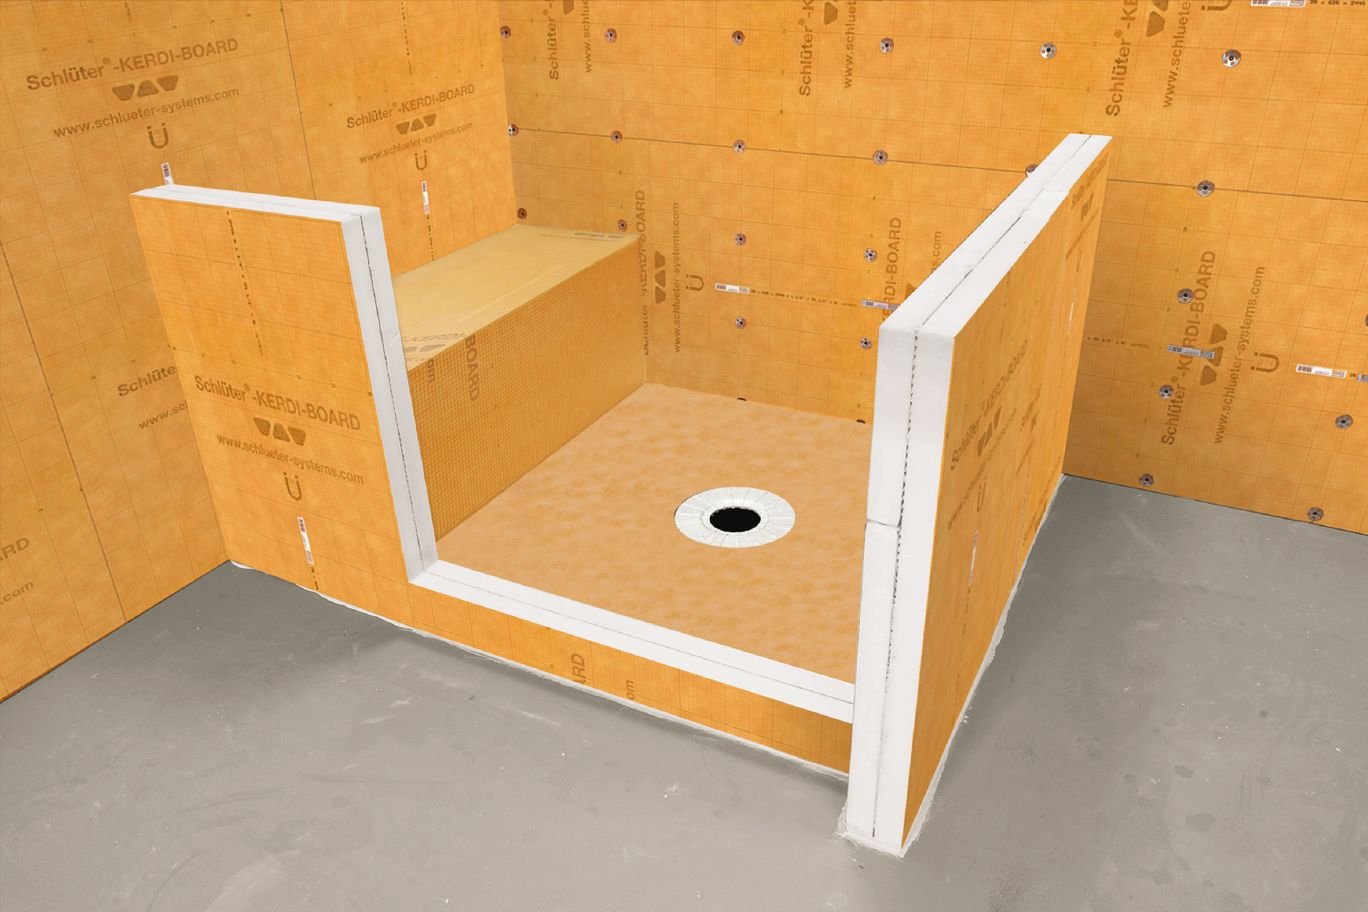
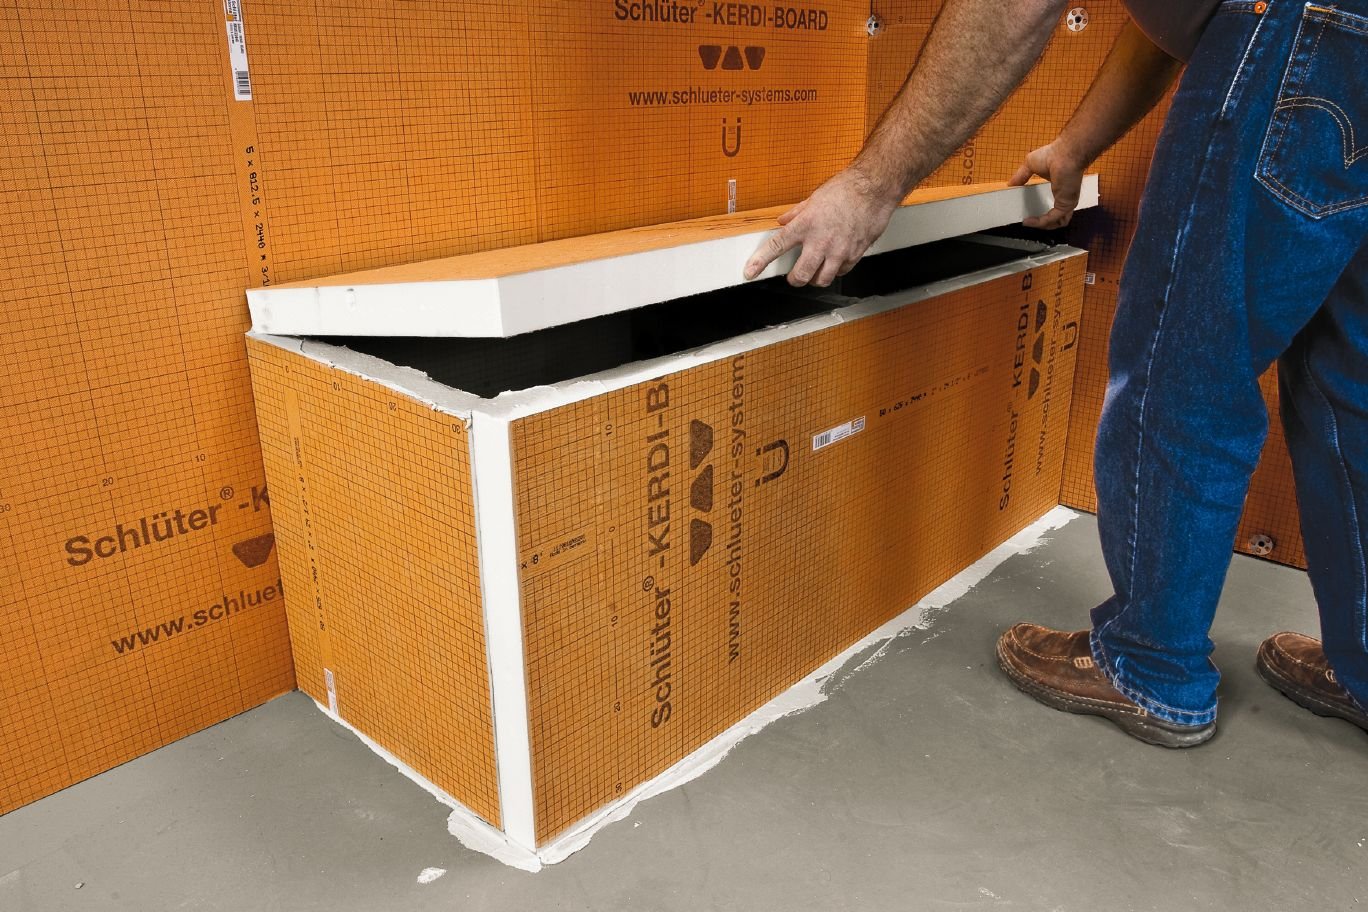
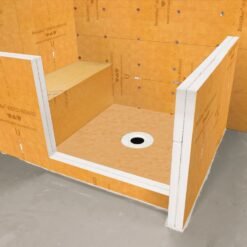
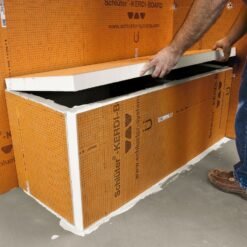
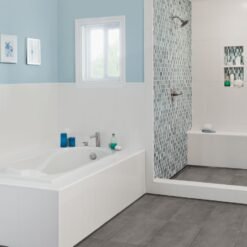
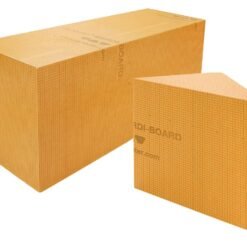
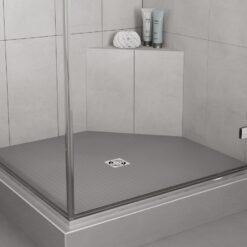
Schluter®-KERDI-BOARD is a multifunctional tile substrate and building panel, which can also be used in bonded waterproofing assemblies with tile. KERDI-BOARD allows you to quickly and easily build tile-ready elements in showers, bathtub surrounds and platforms, countertops, vanities, shelving, and more!
- Fosters creativity in the construction of bonded waterproofing assemblies to be tiled
- Build custom vanities, shelving units, countertops, bathtub surrounds, and so much more
- Replaces other suitable solid backing panels (i.e. gypsum board, cement backer board)
- Even, impact-resistant, and rigid
- Waterproof, thermally insulating and dimensionally stable
- Lightweight, easy to handle and transport
- Contains no cement or fiberglass for a dust-free installation
- Extruded polystyrene foam panel
- Fleece webbing for effective bonding of tile to the surface
Function
Schluter®-KERDI-BOARD is a multifunctional tile substrate and building panel, which can also be used for creating bonded waterproofing assemblies with tile coverings. It consists of an extruded polystyrene foam panel, with a special reinforcement material on both sides and fleece webbing for effective anchoring in thin-set mortar.
With the available panel thicknesses of 3/16″, 3/8″, 1/2″, 5/8″, 3/4″, 1″, 1-1/2″, and 2″ (5, 9, 12.5, 15, 19, 25, 38, and 50 mm), KERDI-BOARD allows the installer to prepare and create a broad range of substrates and building elements for the installation of ceramic and natural stone tile that are flat, level, plumb, square, and dimensionally stable. With suitable preparation of the abutting seams and joint areas, the panel may be used for bonded waterproofing assemblies.
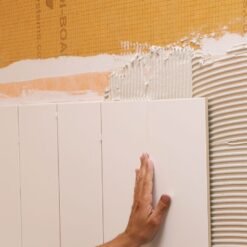
The boards are simply cut to size with a utility knife. The gridlines, which are printed on the surface, are helpful for neat and quick cuts and installation. Tiles can be installed directly over KERDI-BOARD using the thin-set method.
Installation
Fully embedded KERDI-BOARD Any board thickness suitable 1. Remove all surface contaminants from the substrate that may weaken the bond. 2. Apply thin-set mortar to the substrate and/or onto KERDI-BOARD with a notched trowel. The mortar must bond to the substrate and mechanically anchor the fleece on the KERDI-BOARD surface. 3. Apply the panels to the wall and firmly press them in place to ensure full coverage. 4. Tightly abut the individual panels and align them appropriately. 5. The tiles can be installed immediately using Schluter-SET, Schluter-ALL-SET, Schluter-FAST-SET, or unmodified thin-set mortar. Choose a notched trowel to match the tile format, and back-butter the tiles, if necessary, to attain full coverage. Note: If the bond between the thin-set mortar and substrate is questionable, additional mechanical attachment with the KERDI-BOARD-ZSD anchors or KERDI-BOARD-ZT washers and corresponding screws is required. Fasteners are installed after the thin-set mortar has hardened. Note: See section “Waterproofing” on the use of KERDI-BOARD in bonded waterproofing assemblies.
Spot-bonded KERDI-BOARD Minimum board thickness = 3/8″ (9 mm) 1. Remove all surface contaminants from the substrate that may weaken the bond. 2. Place spots of thin-set mortar on the KERDI-BOARD panel or substrate in intervals of approx. 12″ (30 cm). The mortar must bond to the substrate and mechanically anchor the fleece on the KERDI-BOARD surface. 3. Apply the panels to the wall, firmly press them in place, and align them with a straight-edge or level. 4. The tiles can be installed immediately using Schluter-SET, Schluter-ALL-SET, Schluter-FAST-SET, or unmodified thin-set mortar. Choose a notched trowel to match the tile format, and back-butter the tiles, if necessary, to attain full coverage. Note: If the bond between the thin-set mortar and substrate is questionable, additional mechanical attachment with the KERDI-BOARD-ZSD anchors or KERDI-BOARD-ZT washers and corresponding screws is required. Fastener locations must coincide with mortar spots. This may be ensured by making holes in the KERDI-BOARD at the desired fastener locations prior to applying mortar spots. Fasteners are installed after the thin-set mortar has hardened. Note: See section “Waterproofing” on the use of KERDI-BOARD in bonded waterproofing assemblies.
Use of KERDI-BOARD on wood or metal framingMinimum board thickness = 1/2″ (12.5 mm) for studs spaced at 16″ (40.6 cm) o.c.; 3/4″ (19 mm) for studs spaced at 24″ (61.0 cm) o.c.1. KERDI-BOARD can be mounted vertically or horizontally on wood or metal framing with screws (i.e. coarse thread wood screw for wood studs and self-tapping for metal studs) and corresponding KERDI-BOARD-ZT washers. Abut the individual panels over the center of the studs or other solid backing.2. The selected screws must be of sufficient length to reach a depth of at least 3/4″ (20 mm) in wood studs and at least 3/8″ (10 mm) in metal studs. The maximum allowable on-center fastener spacing is 12″ (30 cm) for walls and 6″ (15 cm) for ceilings. Screws may be placed between adjacent panels such that the washers fasten both panel edges.3. The tiles can be installed immediately using Schluter-SET, Schluter-ALL-SET, Schluter-FAST-SET, or unmodified thin-set mortar. Choose a notched trowel to match the tile format, and back-butter the tiles, if necessary, to attain full coverage.Note: See section “Waterproofing” on the use of KERDI-BOARD in bonded waterproofing assemblies.
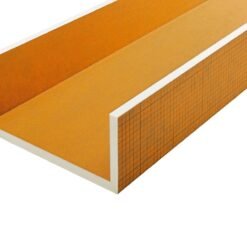
Use of KERDI-BOARD in non-bearing partition wall systems Minimum board thickness = 2″ (50 mm) 1. Schluter®-KERDI-BOARD is adhered to the permanent wall in such a way as to provide lateral stability. This can be achieved by sandwiching the panel between adjacent KERDI-BOARD panels, fixed building elements, etc. As an alternative, the KERDI-BOARD-ZW angle profile or KERDI-BOARD-ZB U-shaped profile may be screw-mounted to the wall prior to partition installation. 2. Open-ended partition walls can be further stabilized with the corresponding KERDI-BOARD-ZA/-ZB U-shaped profiles. If you plan to screw finishing hardware (e.g., shower door hinges) to the U-shaped profile, adhere the matching KERDI-BOARD-ZFP flat plastic profile to the back of the U-shaped profile to improve the fastening of the screws. U-shaped profiles may also be used for connections in the floor and ceiling areas. 3. If multiple KERDI-BOARD panels are required to create the desired partition, the panels must be arranged horizontally with the joints sealed using thin-set mortar or Schluter®-KERDI-FIX adhesive. The KERDI-BOARD-ZW angle profile or KERDI-BOARD-ZB U-shaped profile may be included in the joints for improved stability. 4. Such partition walls are not to be considered load-bearing structural walls. As a rule, use the 2″ (50 mm) panels for these elements. Panels from a thickness of 3/4″ (19 mm) may be used for building shelving. Again, this must be evaluated in accordance with the building specifications. 5. The tiles can be installed using Schluter-SET, Schluter-ALL-SET, Schluter-FAST-SET, or unmodified thin-set mortar once the bonding materials used to construct the partition have cured sufficiently to stabilize the assembly. Choose a notched trowel to match the tile format, and back-butter the tiles, if necessary, to attain full coverage. Note: See section “Waterproofing” on the use of KERDI-BOARD in bonded waterproofing assemblies.
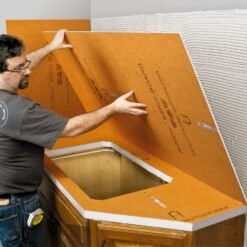
Countertops made of KERDI-BOARD Minimum board thickness = 1-1/2″ (38 mm) 1. KERDI-BOARD is adhered directly to base cabinets using the Schluter®-KERDI-FIX adhesive. All joints of KERDI-BOARD panels must be sealed with KERDI-FIX or thin-set mortar. 2. The backsplash may consist of KERDI-BOARD or other appropriate tile substrate. Seal the countertop/backsplash transition with Schluter®-KERDI-BAND using Schluter-SET, Schluter-ALL-SET, Schluter-FAST-SET, or unmodified thin-set mortar. 3. Countertop edges may be finished with the KERDI-BOARD-ZC brushed stainless steel U-profile and corresponding Schluter®-QUADEC or Schluter®-RONDEC, RONDEC-CT, or RONDEC-STEP profiles. a. Apply KERDI-FIX to the inside vertical surface of the KERDI-BOARD-ZC profile and slide the profile over the edge of the KERDI-BOARD, pushing it tightly against the panel. The corresponding QUADEC or RONDEC profiles are installed with Schluter-SET, Schluter-ALL-SET, Schluter-FAST-SET, or unmodified thin-set mortar in conjunction with the tile. b. RONDEC-CT and RONDEC-STEP profiles are installed with Schluter-SET, Schluter-ALL-SET, Schluter-FAST-SET, or unmodified thin-set mortar in conjunction with the tile. 4. The countertop/backsplash transition may be finished with one of the Schluter®-DILEX cove-shaped profiles. Various materials and finishes are available to match the sink rail profiles above. 5. Sinks may be mounted on top of the tile or tiled-under using RONDEC or QUADEC profiles and corresponding sink corners. 6. The tiles can be installed immediately using Schluter-SET, Schluter-ALL-SET, Schluter-FAST-SET, or unmodified thin-set mortar. Choose a notched trowel to match the tile format, and back-butter the tiles, if necessary, to attain full coverage. Note: Please refer to the Walls and Countertops Profiles data sheet for additional information on profiles, including installation instructions. A bearing plate must be provided for fastening fixtures (e.g., faucet, soap dispenser, etc.) in tiled-under sink applications to distribute the pressure of the fixture hardware on the underside of the assembly. This may be performed by routing a section from the top of the KERDI-BOARD in the area where the fixtures are to be placed. Apply a corresponding piece of ceramic tile with thin-set mortar in the resulting space flush with the surface of the KERDI-BOARD. In general, it is recommended that the tile be at least 5/16″ (8 mm) -thick and extend approximately 1-1/2″ (38 mm) beyond the fixture hardware on all sides. Once the countertop is tiled and grouted, holes may be drilled through the assembly to fit the fixture-mounting studs. Additional material may be removed from the underside of the KERDI-BOARD to allow installation of the fixture hardware.
Waterproofing with KERDI-BOARD Where waterproofing is desired, the joints and corners of KERDI-BOARD in the area must be sealed with KERDI-BAND using Schluter-SET, Schluter-ALL-SET, Schluter-FAST-SET, or unmodified thin-set mortar. The KERDI-BAND must overlap panel joints by at least 2″ (50 mm). KERDI-BAND is also suitable for sealing connections to fixed building elements such as door and window frames. Where these surfaces will not accept a bond to Schluter-SET, Schluter-ALL-SET, Schluter-FAST-SET, or unmodified thin-set mortar, use KERDI-FIX to bond KERDI-BAND. Separate KERDI-BOARD above the existing movement joints and structural joints and cover the joints with Schluter®-KERDI-FLEX using Schluter-SET, Schluter-ALL-SET, Schluter-FAST-SET, or unmodified thin-set mortar, ensuring a minimum 2″ (50 mm) overlap. Fastener penetrations may be sealed with KERDI-BAND using Schluter-SET, Schluter-ALL-SET, Schluter-FAST-SET, or unmodified thin-set mortar. Please refer to the Schluter®-Shower System Installation Handbook for guidelines on waterproofing showers, steam showers, and tub surrounds. Note: Certain glass tiles may not be compatible with bonded waterproofing applications and/or may require special setting materials. Consult glass tile manufacturer and Schluter-Systems for more information. Certain moisture-sensitive stones, e.g., green marble, or resin-backed tiles may not be appropriate for use in wet areas or may require special setting materials. Consult stone supplier and Schluter-Systems for more information. If installing bathroom fixtures such as grab bars in showers, wall-mounted toilets, or other heavy objects, the fixtures must be anchored in the structure or solid blocking behind KERDI-BOARD. Note: Reinforcement may be required behind the entire footprint of the object. For example, place solid blocking behind the base of a wall-mounted toilet installed over KERDI-BOARD on stud framing.
Maintenance
KERDI-BOARD should be stored flat. In case of outdoor storage, protect the material from direct sunlight and weather exposure.
Schluter®-KERDI-BOARD
Schluter®-KERDI-BOARD es un sustrato y panel de construcción de baldosas multifuncionales, que también se puede usar en conjuntos de impermeabilización unidos con baldosas. ¡KERDI-BOARD le permite construir rápida y fácilmente elementos listos para azulejos en duchas, bañeras y plataformas, encimeras, tocadores, estanterías y más!
- Fomenta la creatividad en la construcción de conjuntos de impermeabilización adheridos para ser alicatados
- Construya tocadores personalizados, estanterías, encimeras, bañeras y mucho más.
- Reemplaza otros paneles de soporte sólidos adecuados (es decir, paneles de yeso, paneles de soporte de cemento)
- Incluso, resistente a los golpes y rígido
- Impermeable, aislante térmico y dimensionalmente estable.
- Ligero, fácil de manejar y transportar.
- No contiene cemento ni fibra de vidrio para una instalación sin polvo.
- Panel de espuma de poliestireno extruido
- Cinta de vellón para una unión efectiva de la loseta a la superficie
Función
Schluter®-KERDI-BOARD es un sustrato de mosaico y panel de construcción multifuncionales, que también se puede utilizar para crear conjuntos de impermeabilización adheridos con revestimientos de mosaico. Consiste en un panel de espuma de poliestireno extruido, con un material de refuerzo especial en ambos lados y cinta de vellón para un anclaje efectivo en mortero de capa delgada.
Con los espesores de panel disponibles de 3/16 “, 3/8”, 1/2 “, 5/8”, 3/4 “, 1”, 1-1 / 2 “y 2” (5, 9, 12.5 , 15, 19, 25, 38 y 50 mm), KERDI-BOARD permite al instalador preparar y crear una amplia gama de sustratos y elementos de construcción para la instalación de baldosas de cerámica y piedra natural que son planas, niveladas, aplomadas, cuadradas y dimensionalmente estable. Con una preparación adecuada de las costuras contiguas y las áreas de unión, el panel puede usarse para ensamblajes de impermeabilización unidos.
Las tablas simplemente se cortan a medida con un cuchillo para uso general. Las líneas de cuadrícula, que están impresas en la superficie, son útiles para cortes e instalación limpios y rápidos. Los mosaicos se pueden instalar directamente sobre KERDI-BOARD utilizando el método de configuración delgada.
Instalación
TABLERO KERDI totalmente incrustado Cualquier espesor de placa adecuado 1. Retire todos los contaminantes de la superficie del sustrato que puedan debilitar la unión. 2. Aplique mortero de capa delgada al sustrato y / o al KERDI-BOARD con una llana dentada. El mortero debe adherirse al sustrato y anclar mecánicamente el vellón en la superficie KERDI-BOARD. 3. Aplique los paneles a la pared y presiónelos firmemente para asegurar una cobertura total. 4. Apriete firmemente los paneles individuales y alinéelos adecuadamente. 5. Las baldosas se pueden instalar inmediatamente con Schluter-SET, Schluter-ALL-SET, Schluter-FAST-SET o mortero de capa delgada no modificado. Elija una llana dentada para que coincida con el formato de mosaico y aplique mantequilla en los mosaicos, si es necesario, para lograr una cobertura total. Nota: Si la unión entre el mortero de capa delgada y el sustrato es cuestionable, se requiere un accesorio mecánico adicional con los anclajes KERDI-BOARD-ZSD o las arandelas KERDI-BOARD-ZT y los tornillos correspondientes. Los sujetadores se instalan después de que el mortero de fraguado fino se haya endurecido. Nota: Consulte la sección “Impermeabilización” sobre el uso de KERDI-BOARD en conjuntos de impermeabilización adheridos.
KERDI-BOARD adherido por puntos Espesor mínimo de la placa = 3/8 “(9 mm) 1. Retire todos los contaminantes de la superficie del sustrato que puedan debilitar la unión. 2. Coloque manchas de mortero de capa delgada en el panel o sustrato KERDI-BOARD en intervalos de aproximadamente 12 “(30 cm). El mortero debe adherirse al sustrato y anclar mecánicamente el vellón en la superficie KERDI-BOARD. 3. Aplique los paneles a la pared, presione firmemente en su lugar y alinéelos con un borde recto o nivelado. 4. Las baldosas se pueden instalar inmediatamente con Schluter-SET, Schluter-ALL-SET, Schluter-FAST-SET o mortero de capa delgada no modificado. Elija una llana dentada para que coincida con el formato de mosaico y aplique mantequilla en los mosaicos, si es necesario, para lograr una cobertura total. Nota: Si la unión entre el mortero de capa delgada y el sustrato es cuestionable, se requiere un accesorio mecánico adicional con los anclajes KERDI-BOARD-ZSD o las arandelas KERDI-BOARD-ZT y los tornillos correspondientes. Las ubicaciones de los sujetadores deben coincidir con las manchas de mortero. Esto puede garantizarse haciendo agujeros en el KERDI-BOARD en los lugares de fijación deseados antes de aplicar puntos de mortero. Los sujetadores se instalan después de que el mortero de fraguado fino se haya endurecido. Nota: Consulte la sección “Impermeabilización” sobre el uso de KERDI-BOARD en conjuntos de impermeabilización adheridos.
Uso de KERDI-BOARD en marcos de madera o metal Espesor mínimo del tablero = 1/2 “(12.5 mm) para postes espaciados a 16” (40.6 cm) o.c .; 3/4 “(19 mm) para pernos espaciados a 24” (61.0 cm) o.c.1. KERDI-BOARD se puede montar vertical u horizontalmente en marcos de madera o metal con tornillos (es decir, tornillo de madera de rosca gruesa para pernos de madera y autorroscantes para pernos de metal) y las arandelas KERDI-BOARD-ZT correspondientes. Apoye los paneles individuales sobre el centro de los montantes u otro respaldo sólido. Los tornillos seleccionados deben tener una longitud suficiente para alcanzar una profundidad de al menos 3/4 “(20 mm) en pernos de madera y al menos 3/8” (10 mm) en pernos de metal. El espacio máximo permitido en el centro del sujetador es de 12 “(30 cm) para paredes y 6” (15 cm) para techos. Se pueden colocar tornillos entre los paneles adyacentes de modo que las arandelas fijen ambos bordes del panel. Las baldosas se pueden instalar inmediatamente usando Schluter-SET, Schluter-ALL-SET, Schluter-FAST-SET o mortero de capa delgada no modificado. Elija una llana dentada para que coincida con el formato de mosaico y aplique mantequilla en los azulejos, si es necesario, para lograr una cobertura total. Nota: Consulte la sección “Impermeabilización” sobre el uso de KERDI-BOARD en conjuntos de impermeabilización adheridos.
Uso de KERDI-BOARD en sistemas de tabique sin soporte Espesor mínimo de la tabla = 2 “(50 mm) 1. Schluter®-KERDI-BOARD se adhiere a la pared permanente de manera que proporcione estabilidad lateral. Esto se puede lograr intercalando el panel entre paneles adyacentes KERDI-BOARD, elementos de construcción fijos, etc. Como alternativa, el perfil angular KERDI-BOARD-ZW o el perfil en forma de U KERDI-BOARD-ZB se pueden atornillar a la pared antes de la partición instalación 2. Las paredes divisorias abiertas se pueden estabilizar aún más con los perfiles KERDI-BOARD-ZA / -ZB en forma de U correspondientes. Si planea atornillar la tornillería de acabado (p. ej., bisagras de puertas de ducha) al perfil en forma de U, adhiera el perfil de plástico plano KERDI-BOARD-ZFP a juego en la parte posterior del perfil en forma de U para mejorar la fijación de los tornillos. Los perfiles en forma de U también se pueden usar para conexiones en las áreas de piso y techo. 3. Si hay múltiples KERDI -Los paneles del TABLERO son necesarios para crear la partición deseada, los paneles deben estar dispuestos h horizontalmente con las juntas selladas con mortero de capa delgada o adhesivo Schluter®-KERDI-FIX. El perfil angular KERDI-BOARD-ZW o el perfil en forma de U KERDI-BOARD-ZB se pueden incluir en las juntas para mejorar la estabilidad. 4. Tales tabiques no deben considerarse muros estructurales de carga. Como regla general, use los paneles de 2 “(50 mm) para estos elementos. Se pueden usar paneles de un grosor de 3/4” (19 mm) para construir estanterías. Nuevamente, esto debe evaluarse de acuerdo con las especificaciones del edificio. 5. Las baldosas se pueden instalar con Schluter-SET, Schluter-ALL-SET, Schluter-FAST-SET o mortero de fraguado fino no modificado una vez que los materiales de unión utilizados para construir la partición se hayan curado lo suficiente como para estabilizar el ensamblaje. Elija una llana dentada para que coincida con el formato de mosaico y aplique mantequilla en los mosaicos, si es necesario, para lograr una cobertura total. Nota: Consulte la sección “Impermeabilización” sobre el uso de KERDI-BOARD en conjuntos de impermeabilización adheridos.
Encimeras hechas de KERDI-BOARD Espesor mínimo de la tabla = 1-1 / 2 “(38 mm) 1. KERDI-BOARD se adhiere directamente a los gabinetes base usando el adhesivo Schluter®-KERDI-FIX. Todas las juntas de los paneles KERDI-BOARD deben ser sellado con KERDI-FIX o mortero de capa delgada 2. El protector contra salpicaduras puede consistir en KERDI-BOARD u otro sustrato de baldosas apropiado. , Schluter-FAST-SET, o mortero de fraguado fino no modificado 3. Los bordes de la encimera pueden terminarse con el perfil en U de acero inoxidable cepillado KERDI-BOARD-ZC y el correspondiente Schluter®-QUADEC o Schluter®-RONDEC, RONDEC-CT, o perfiles RONDEC-STEP a. Aplique KERDI-FIX a la superficie vertical interior del perfil KERDI-BOARD-ZC y deslice el perfil sobre el borde del KERDI-BOARD, empujándolo firmemente contra el panel. El QUADEC o RONDEC correspondiente los perfiles se instalan con Schluter-SET, Schluter-ALL-SET, Schluter-FAST-SET o mortero de capa delgada no modificado unión con el azulejo. si. Los perfiles RONDEC-CT y RONDEC-STEP se instalan con Schluter-SET, Schluter-ALL-SET, Schluter-FAST-SET o mortero de capa delgada no modificado junto con la loseta. 4. La transición de la encimera / protector contra salpicaduras puede terminarse con uno de los perfiles en forma de cala Schluter®-DILEX. Varios materiales y acabados están disponibles para que coincidan con los perfiles del riel del fregadero de arriba. 5. Los fregaderos se pueden montar en la parte superior de la loseta o debajo de mosaico usando los perfiles RONDEC o QUADEC y las esquinas correspondientes del fregadero. 6. Las baldosas se pueden instalar inmediatamente usando Schluter-SET, Schluter-ALL-SET, Schluter-FAST-SET o mortero de capa delgada no modificado. Elija una llana dentada para que coincida con el formato de mosaico y aplique mantequilla en los mosaicos, si es necesario, para lograr una cobertura total. Nota: Consulte la hoja de datos de Perfiles de muros y encimeras para obtener información adicional sobre los perfiles, incluidas las instrucciones de instalación. Se debe proporcionar una placa de apoyo para sujetar los accesorios (p. Ej., Grifo, dispensador de jabón, etc.) en aplicaciones de fregaderos con azulejos para distribuir la presión del hardware del accesorio en la parte inferior del conjunto. Esto se puede realizar enrutando una sección desde la parte superior del KERDI-BOARD en el área donde se colocarán los accesorios. Aplique una pieza correspondiente de baldosas cerámicas con mortero de capa delgada en el espacio resultante al ras con la superficie del KERDI-BOARD. En general, se recomienda que la loseta tenga al menos 5/16 “(8 mm) de grosor y se extienda aproximadamente 1-1 / 2” (38 mm) más allá del hardware del accesorio en todos los lados. Una vez que la encimera está alicatada y agrupada, se pueden perforar agujeros a través del conjunto para que se ajusten a los pernos de montaje del accesorio. Se puede quitar material adicional de la parte inferior del KERDI-BOARD para permitir la instalación del hardware del dispositivo.
Impermeabilización con KERDI-BOARD Cuando se desee la impermeabilización, las juntas y esquinas de KERDI-BOARD en el área deben sellarse con KERDI-BAND usando Schluter-SET, Schluter-ALL-SET, Schluter-FAST-SET o un conjunto delgado no modificado mortero. KERDI-BAND debe superponerse a las juntas del panel al menos 2 “(50 mm). KERDI-BAND también es adecuado para sellar conexiones a elementos de construcción fijos como marcos de puertas y ventanas. Donde estas superficies no aceptarán una unión a Schluter-SET , Schluter-ALL-SET, Schluter-FAST-SET, o mortero de fraguado fino no modificado, use KERDI-FIX para unir KERDI-BAND. Separe KERDI-BOARD por encima de las juntas de movimiento y juntas estructurales existentes y cubra las juntas con Schluter®- KERDI-FLEX utilizando Schluter-SET, Schluter-ALL-SET, Schluter-FAST-SET o mortero de fraguado fino no modificado, asegurando una superposición mínima de 2 “(50 mm). Las penetraciones de sujetadores pueden sellarse con KERDI-BAND usando Schluter-SET, Schluter-ALL-SET, Schluter-FAST-SET o mortero de capa delgada no modificado. Consulte el Manual de instalación del sistema de ducha Schluter® para obtener pautas sobre duchas impermeables, duchas de vapor y alrededores de la bañera. Nota: Ciertas baldosas de vidrio pueden no ser compatibles con las aplicaciones de impermeabilización adheridas y / o pueden requerir materiales de fraguado especiales. Consulte al fabricante de baldosas de vidrio y Schluter-Systems para obtener más información. Ciertas piedras sensibles a la humedad, por ejemplo, mármol verde o baldosas con respaldo de resina pueden no ser apropiadas para su uso en áreas húmedas o pueden requerir materiales de fraguado especiales. Consulte al proveedor de piedra y Schluter-Systems para obtener más información. Si instala accesorios de baño como barras de apoyo en duchas, inodoros montados en la pared u otros objetos pesados, los accesorios deben estar anclados en la estructura o en un bloque sólido detrás de KERDI-BOARD. Nota: Es posible que se requiera refuerzo detrás de toda la huella del objeto. Por ejemplo, coloque un bloqueo sólido detrás de la base de un inodoro montado en la pared instalado sobre KERDI-BOARD en la estructura del montante.
Mantenimiento
KERDI-BOARD debe almacenarse plano. En caso de almacenamiento al aire libre, proteja el material de la luz solar directa y la exposición a la intemperie.
Downloads
Product Sheet
| Brand | Schluter Systems |
|---|
Related products
Building Materials
Schluter Systems
Brands
Brands
Schluter Systems


